Grilling looks simple. It is not. There are people who have been doing it for decades and still produce dry chicken, charred-outside-raw-inside burgers, and grey steaks. The difference between competent grilling and great grilling comes down to a small set of repeatable disciplines — and once you know them, every cookout gets noticeably better.
The Two Foundations: Heat Management and Time
Every grilling failure traces back to one of two things: you didn't manage the heat, or you didn't respect the time. Heat management means knowing where the hot spots are, building deliberate cool zones, and choosing the right setup for the protein in front of you. Time means letting things cook without poking them, and resting them properly before slicing.
The good news: those two skills account for maybe 80% of what makes a great griller. The other 20% is fire chemistry, fuel selection, and a handful of equipment habits.
Charcoal, Wood, Gas, Pellets — What To Actually Use
Charcoal
Charcoal — specifically lump hardwood charcoal — is our default. It burns hotter than gas, imparts real flavor, and gives you precise control if you understand how to bank coals into zones. For everyday grilling, a 22-inch kettle grill plus a chimney starter plus a bag of lump charcoal is the most versatile setup money can buy.
Wood
Pure wood fires are the highest expression of grilling and the hardest to control. They're for advanced cooks with patience. The flavor reward is real — but the learning curve is steeper than charcoal.
Gas
Gas wins on convenience. It loses on flavor and on peak temperature ceiling. For weeknight cooking, a quality gas grill produces excellent results — especially with a smoker box for flavor. For weekend showpiece cooking, return to charcoal.
Pellets
Pellet grills are essentially outdoor convection ovens that happen to burn wood. They excel at long, low cooks (brisket, ribs, pulled pork). They struggle at high searing temperatures. Pair one with a kettle or cast iron for the best of both worlds.
The Two-Zone Fire: Non-Negotiable
Build a hot side and a cool side. On charcoal, this means banking the coals to one half of the grill. On gas, it means turning two burners on high and the others off. The hot side sears, develops crust, and finishes thin items. The cool side cooks thick cuts through without burning the exterior, holds finished food warm, and gives you somewhere to move food when flare-ups happen.
If you do nothing else after reading this page, build a two-zone fire next time you grill. Your results will improve immediately.
Temperature Targets That Matter
- Direct sear zone: 450–550°F surface temperature
- Indirect zone: 250–350°F
- Low-and-slow smoking: 225°F
- Reverse-sear oven/grill phase: 250°F until internal hits 115°F (for medium-rare)
Internal Temperatures Every Cook Should Memorize
- Beef (steak, medium-rare): pull at 125°F, rest to 130°F
- Beef (burger): pull at 145°F
- Pork (chops): pull at 140°F, rest to 145°F
- Pork (shoulder, pulled): 203°F
- Chicken (breast): pull at 160°F, rest to 165°F
- Chicken (thigh): pull at 170°F — dark meat benefits from a higher finish
- Salmon: pull at 125°F for medium
- Shrimp: just opaque, 2–3 min per side over high heat
Technique Playbooks By Protein
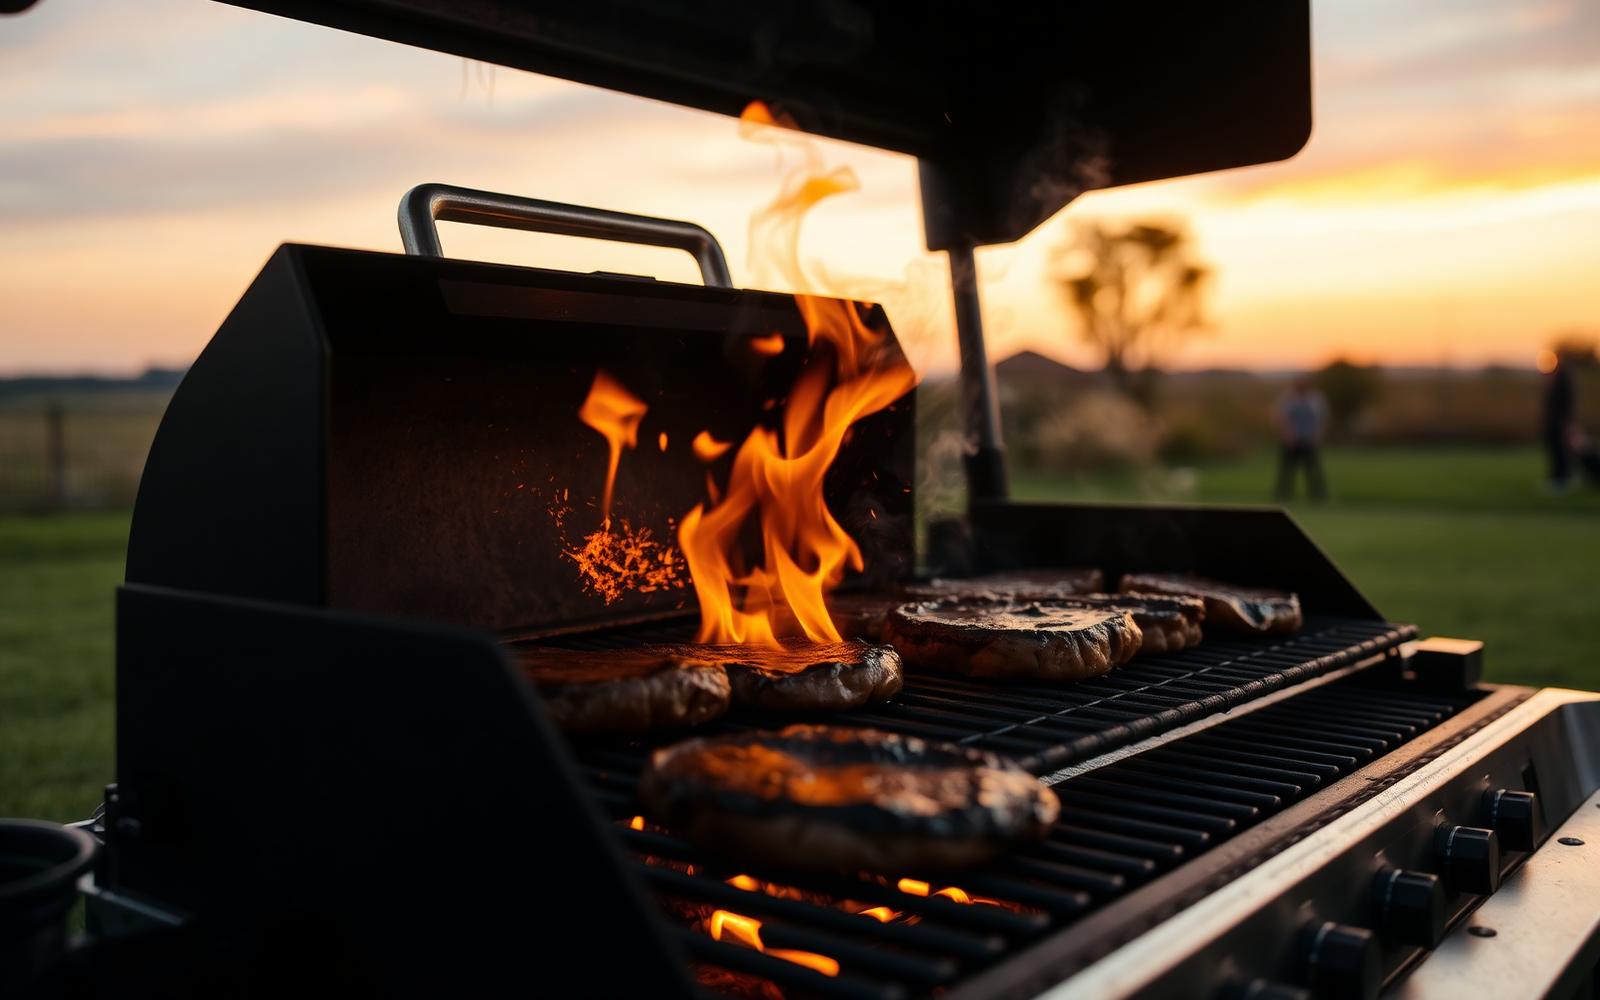
The Burger
Two minutes per side, single flip, ripping hot grates, cheese added in the final minute. No pressing. No flipping more than once. For the complete protocol, read the perfect burger field guide.
The Steak
For anything 1.5 inches or thicker, reverse sear. Start low (250°F indirect) until internal hits 115°F, then transfer to ripping-hot direct heat for 60–90 seconds per side. For thinner steaks, sear hot and fast. Full breakdown in our steak techniques guide.
Bone-In Chicken
Skin-side down on the cooler zone for 25 minutes, then flip and move to the hot side for the final 5–10 minutes to crisp the skin. Pull thighs at 170°F internal.
Shrimp
Skewered or on a grill basket. High heat, 2 minutes per side. Off the grill the second they turn opaque. Overcooked shrimp is rubber.
Vegetables
Toss in olive oil and salt. Cook on direct heat with the lid up. Asparagus 4 minutes total. Zucchini 3 minutes per side. Corn 12 minutes, rotating quarters.
Whole Fish
Scored skin, oiled grates, indirect heat with the lid down. Don't try to flip a whole fish more than once.
Common Grilling Mistakes
We've catalogued the ten biggest in a dedicated piece — see common grilling mistakes (and how to fix them). The short version: don't press burgers, don't lift the lid, do build two zones, do rest the meat.
Equipment That Actually Matters
- Chimney starter: the single best $20 you'll spend on grilling
- Instant-read thermometer: the single most important tool. Don't grill without one.
- Heavy stainless tongs
- Grill brush (or a half-onion if you're particular about wire bristles)
- Heavy-duty foil for tenting, indirect cooking, and reheating
- A spray bottle of water for taming small flare-ups
Charcoal vs Gas: The Final Word
You do not have to choose. The serious grillers we know almost all own one of each. Gas for weeknights when you want a 20-minute dinner. Charcoal for weekends when the cook is part of the event. If you can only own one for now, get the kettle — it does more.
FAQ
How much charcoal do I need?
A full chimney (about 80 briquettes or roughly 4 lbs of lump) is right for most direct-heat cooks. Use a chimney and a half for longer sessions.
How do I add wood smoke to a gas grill?
Use a metal smoker box filled with soaked wood chips, set directly on the burner grate.
How do I avoid flare-ups?
Move fatty proteins to the cool side, keep the lid mostly closed, and have a place to move food fast if flames climb.
Best wood for smoking?
Hickory and oak for beef. Apple and cherry for pork and poultry. Pecan for everything.
Where To Go Next
Apply what you just read by picking one of these recipes: grill the perfect burger, master the reverse sear, or build a shrimp burger. When you're ready to host, the BBQ party planning guide brings it all together.